How to add multiple upload iframe inside InfoPath
You can find script here
Step1
Follow link and add html inside textarea, add the below
https://johnliu.net/blog/2011/5/30/infopath-2010-embed-html-for-rich-and-web-forms.html

<?xml version="1.0" encoding="utf-8"?>
<html>
<myhtml>
<p xmlns="http://www.w3.org/1999/xhtml" id="UploadIframe" data-attr="5" data-attr-url="uploadpageUrl"></p>
</myhtml>
</html>
Step2
Create new empty page and add the InfoPath webpart, and add script editor paste the below js code makesure you have JQ reference
<script type="text/javascript" id="onetidPageTitleAreaFrameScript">
//form page
	 var oldId="";
function fixIframe(){
var val=$("[buttonid='uniqueBtnID']")[0].value;
if(val && val!=""){
if(!$("#UploadIframe").hasClass("ready")|| oldId=="" ||oldId!=val){
$("#UploadIframe").addClass("ready");
var element = document.getElementById("UploadIframe");

oldId=val;
var url=element.getAttribute("data-attr-url");

element.innerHTML="<iframe src='"+url+"?IsDlg=1&submittile="+val+"' width='100%' height='400px'></iframe>"
}
}
}
function repeat(){
setInterval(function(){ fixIframe(); }, 200);
}
function  DismissConflictDlg(that, event){
$(".ms-dlgContent").hide();
$(".ms-dlgOverlay").hide();
alert("Can not replace file please rename and upload again");
$("#UploadIframe").removeClass("ready");
}
$(document).ready(function(){

 repeat();
})
</script>
<style>
#contentRow {
    margin-top: -32px;
	padding-top:0px !important;
}
.ms-backgroundImage #sideNavBox{display:none}
.ms-backgroundImage #contentBox{margin-left:50px}
.ms-backgroundImage  div#s4-titlerow {
    display: none !important;
}

.ms-backgroundImage  div#s4-ribbonrow {
    display: none;
}

.ms-backgroundImage  div#suiteBarDelta {
    display: none;
}
 /*fix multiple line text areadiv[scriptclass="RichTextBox"]{display:none !important;}
div[scriptclass="RichTextBox"] +textarea{display:block !important;min-width: 400px;}

div[scriptclass="RichTextCollection"] >div>div{display:none !important;}

//AttachmentsPlaceholder textarea screen tip//
div[title="AttachmentsPlaceholder"] div[scriptclass="RichTextBox"]{display:block !important;}
div[title="AttachmentsPlaceholder"] div[scriptclass="RichTextBox"] +textarea{display:none !important;}
*/
</style></DIV>
Step3
Currently you have created InfoPath form inside SharePoint Page with script editor that will replace textarea xml by Iframe with url as in data-attr-url=”uploadpageUrl”, inside the upload page add script editor and paste the below code
<DIV class="ms-rte-embedcode ms-rte-embedwp"><style>

.js-listview-qcbNewButton,.js-listview-qcbShareButton{display:none }
.ms-backgroundImage  div#s4-ribbonrow {
    display: none;
}
</style>
<script type="text/javascript">
(function (_window) {
    var maxTimeForReplaceUploadProgressFunc = 10000;
    function replaceUploadProgressFunc() {
        if (typeof _window.UploadProgressFunc != 'undefined') {
            _window.Base_UploadProgressFunc = _window.UploadProgressFunc;
            _window.UploadProgressFunc = Custom_UploadProgressFunc;
            console.log('replaced dialog');
$(".ms-dlgOverlay").hide();
        } else if (maxTimeForReplaceUploadProgressFunc > 0) {
            maxTimeForReplaceUploadProgressFunc -= 100;
            setTimeout(replaceUploadProgressFunc, 100);
        }
    }
    setTimeout(replaceUploadProgressFunc, 100);


    function Custom_UploadProgressFunc(percentDone, timeElapsed, state) {
        _window.Base_UploadProgressFunc(percentDone, timeElapsed, state);
        var messageType = ProgressMessage.EMPTY;
        switch (state.status) {
            case 1:
                messageType = ProgressMessage.VALIDATION;
                break;
            case 3:
                messageType = ProgressMessage.UPLOADING;
                break;
            case 4:
                messageType = ProgressMessage.UPLOADED;
                OpenEditFormForLastItem(state);
                break;
            case 5:
                messageType = ProgressMessage.CANCELLED;
                break;
        }

        function OpenEditFormForLastItem(state) {
            var caml = '';
            caml += "<View>";
            caml += "<Query>";
            caml += "<Where>";

            if (state.files.length > 1) {
                caml += "<In>";
                caml += "<FieldRef Name='FileLeafRef'/>";
                caml += "<Values>";
            } else {
                caml += "<Eq>";
                caml += "<FieldRef Name='FileLeafRef'/>";
            }

            state.files.forEach(function (file) {
                //only succesfull uploaded files that arent overwrites
                console.log(file);
                if (file.status === 5 /*&& !file.overwrite*/) {
                    caml += "<Value Type='File'>" + file.fileName + "</Value>";
                }
            }, this);

            if (state.files.length > 1) {
                caml += "</Values>";
                caml += "</In>";
            } else {
                caml += "</Eq>";
            }

            caml += "</Where>";
            caml += "<OrderBy><FieldRef Name='ID' Ascending='True' /></OrderBy>";
            caml += "</Query>";
            caml += "<ViewFields><FieldRef Name='ID' /></ViewFields>";
            caml += "<RowLimit>500</RowLimit>";
            caml += "</View>";
            console.log(caml);

            var cntxt = SP.ClientContext.get_current();
            var web = cntxt.get_web();
            var list = web.get_lists().getByTitle(window.ctx.ListTitle);
            var query = new SP.CamlQuery();
            query.set_viewXml(caml);
            var items = list.getItems(query);
            cntxt.load(list, 'DefaultEditFormUrl');
            cntxt.load(items);
            cntxt.executeQueryAsync(function () {
                var listEnumerator = items.getEnumerator();
                function openEditForItem() {
                    if (listEnumerator.moveNext()) {
                        var item = listEnumerator.get_current();
                        var id = item.get_id();

                        var options = SP.UI.$create_DialogOptions();
                        options.title = "Add File Metadata";
                        options.url = list.get_defaultEditFormUrl() + '?ID=' + id;
                        options.autoSize = true;
                        options.dialogReturnValueCallback = openEditForItem;
                        SP.UI.ModalDialog.showModalDialog(options);
                    } else {
                        location.reload();
                    }
                }
                openEditForItem();
            }, function (error, args) {
                    console.log("failed to get new uploaded items");
                    console.log(error);
                    console.log(args);
                });
        }
    }
})(window);
</script></DIV>
Step4
In this step we will override the Edit document library page by adding script editor and paste the below code. We will need to update the document meta data after upload to set the unique identifier so we can map this file to InfoPath form, so inside the InfoPath form create a Button and set the button label to any value ID-DateTime that you prefer to use, In InfoPath button can get id we will use “uniqueBtnID” as jq selector to get the value from inside form and set this value inside input text field that is the Edit form of uploaded document “uniqueBtnID_87c1fec8-f23c-4e6b-9f12-6d46d90346dc_$TextField” (Replace this selector by your InputText field Id)
<DIV class="ms-rte-embedcode ms-rte-embedwp"><script src="https://cdnjs.cloudflare.com/ajax/libs/jquery/3.6.0/jquery.min.js"></script>
<script type="text/javascript" id="onetidPageTitleAreaFrameScript">

	function getQueryString() {
                var queryStringKeyValue = window.parent.location.search.replace('?', '').split('&');
                var qsJsonObject = {};
                if (queryStringKeyValue != '') {
                    for (i = 0; i < queryStringKeyValue.length; i++) {
                        qsJsonObject[queryStringKeyValue[i].split('=')[0]] = queryStringKeyValue[i].split('=')[1];
                    }
                }
                return qsJsonObject;
            }
			$(document).ready(function(){
			var input = document.getElementById("uniqueBtnID_87c1fec8-f23c-4e6b-9f12-6d46d90346dc_$TextField");


			var val=$('[buttonid="uniqueBtnID"]', window.parent.document)[0].value

            console.log("hu");
			console.log(val);
			input.value=val;
			$("input[id$='diidIOSaveItem']")[0].click();
$(".ms-dlgOverlay").hide();
			})

</script></DIV>
Result
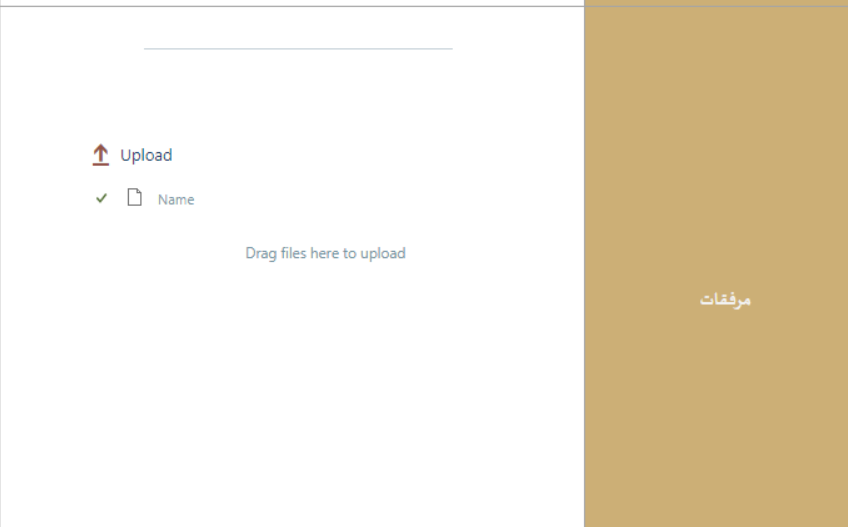
Finally we will get InfoPath web page with section that allow to upload files with drag and drop or upload selector to SharePoint Document library, and after upload will update the properties to map documents to submitted form

Good luck